
Showing posts with label PAPER GOODNESS. Show all posts
Showing posts with label PAPER GOODNESS. Show all posts
Wednesday, February 11, 2015


Tuesday, February 10, 2015
Watercolor Valentine Heart Tutorial
Yes, it's almost that time of the year again...

So how about something quick and easy?
That involves paper and paints..
And is also HANDMADE.

And let's paint them in three different ways: wet-on-wet, ombre and striped.
.JPG)
To check out V-day projects we have done in the past, click on an image below:


For this project you will need:
Scrap papers for your heart stencil/ heart template
1 x 5.5" by 5" piece of watercolor paper
2 x 4" by 4" piece of watercolor paper
Watercolor paints
Brushes
Scissors/ Craft knife
Pencil
Ruler
Masking tape
Wet-on-wet
Start off by drawing a half heart on your scrap piece of paper. Make sure the paper is thicker than the normal printing paper so that the paint doesn't seep through it.
.JPG)
Fold the paper in half lengthwise and cut the heart out. This will be you heart stencil!
.JPG)
.JPG)
Place your stencil on a 5.5" x 5" piece of watercolor paper and adhere it with masking tape.
.JPG)
Mix alizarin crimson with water and paint the heart. Let it dry.
.JPG)
Now working really fast, load your brush with alizarin crimson and paint the heart leaving some areas as you go along so that the first wash shows through.
.JPG)
While the paint is still wet drop in lemon yellow, cadmium orange and cadmium red in the middle, ultramarine blue and purple lake along one of the edges.
.JPG)
Then remove the stencil and let your heart painting dry.
.JPG)
Ombre
Begin by drawing an asymmetrical heart on a scrap piece of paper. Using a craft knife cut out your heart and adhere the stencil on a 4"x 4" piece of watercolor paper.

While the paint is still wet drop in lemon yellow, cadmium orange and cadmium red in the middle, ultramarine blue and purple lake along one of the edges.
Then remove the stencil and let your heart painting dry.
Ombre
Begin by drawing an asymmetrical heart on a scrap piece of paper. Using a craft knife cut out your heart and adhere the stencil on a 4"x 4" piece of watercolor paper.
Load your brush with alizarin crimson and paint the top portion of the heart.
.JPG)
Next add cadmium red in the middle while the paint is still wet so that there's no distinct line separating the two washes. And finally add in purple lake to complete the heart.
.JPG)
.JPG)
Remove the stencil and let dry.
Striped
Make a symmetrical heart on a scrap piece of paper (like we did for wet-on-wet). Cut it out. This time we will use the cut out heart instead of the stencil.
.JPG)
Place your heart cut-out on a 4"x4" piece of watercolor paper and lightly trace around it with a pencil.
.JPG)
Using a ruler, lightly draw horizontal lines at half inch intervals.
.JPG)
Now comes the fun part...painting the stripes!
.JPG)
You can go with whatever color scheme you like. If you want distinct lines, wait for each color to dry before moving on to next.
.JPG)
You can use these as it is with a personal message on the front/back, adhere it to a card or frame it up.
.JPG)
Get creative and have fun painting!
Next add cadmium red in the middle while the paint is still wet so that there's no distinct line separating the two washes. And finally add in purple lake to complete the heart.
Remove the stencil and let dry.
Striped
Make a symmetrical heart on a scrap piece of paper (like we did for wet-on-wet). Cut it out. This time we will use the cut out heart instead of the stencil.
Place your heart cut-out on a 4"x4" piece of watercolor paper and lightly trace around it with a pencil.
Using a ruler, lightly draw horizontal lines at half inch intervals.
Now comes the fun part...painting the stripes!
You can go with whatever color scheme you like. If you want distinct lines, wait for each color to dry before moving on to next.
You can use these as it is with a personal message on the front/back, adhere it to a card or frame it up.
Get creative and have fun painting!
Thursday, February 14, 2013
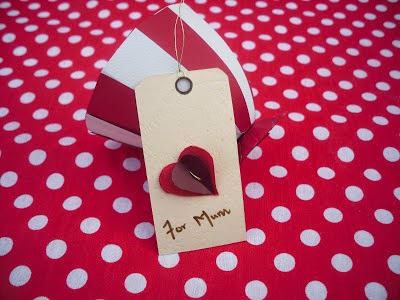
Valentine Project - Message in a Tea Cup
Let's surprise family with love and creativity.


Before we begin, head over to Next to Nicx to learn how to make these adorable paper tea cups.Then come back for message tag tutorial.

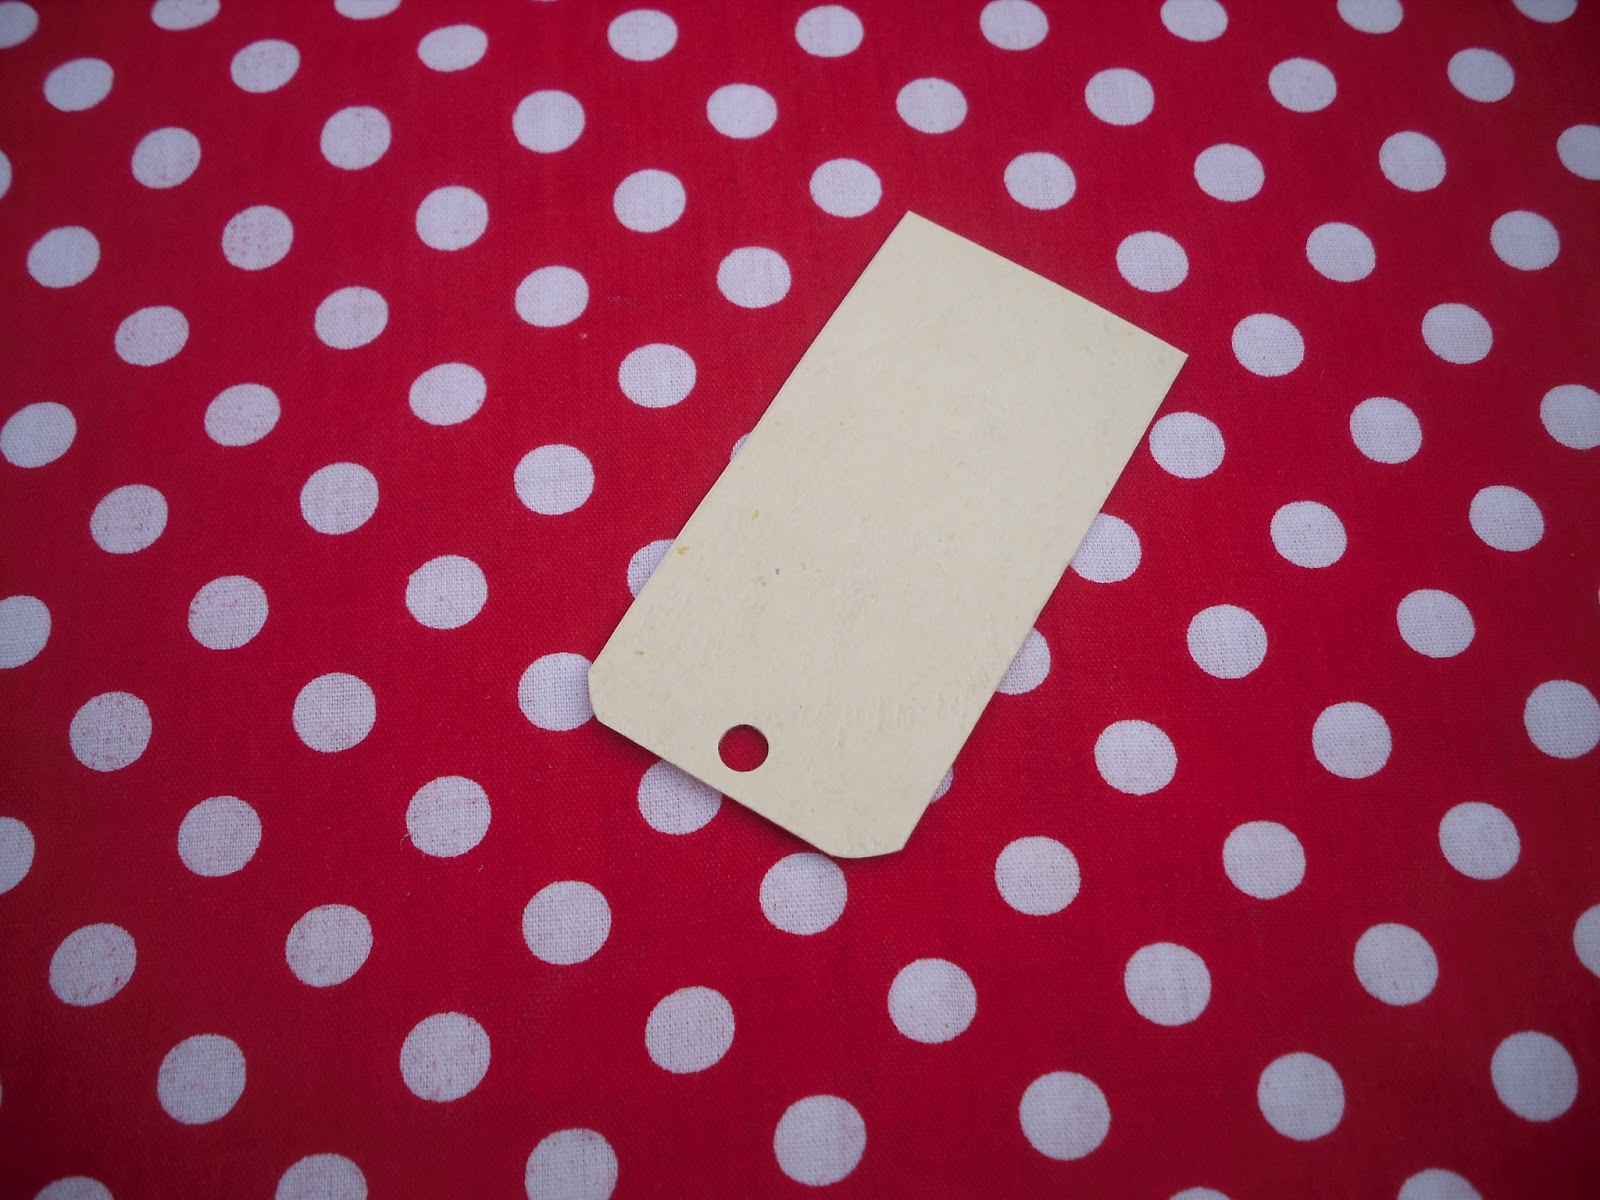
For message tag gather the following supplies:
1.5" by 3" piece of cardstock in your color of choice
2 small heart cut-outs left over from Valentine Bookmarks tutorial
thread and need
brown marker
scissors
punching machine
Curve the top corners of the tag. I used kitchen paper roll to get the curves right.


Punch a hole through the top.
Trim down one heart and center it on top of the larger heart. Fold.

Grab your needle and thread and stitch the two hearts onto the tag.

Knot the two ends together on the back.

Secure thread/ribbon. I have explained how to do so in detail here.

Add text.(My message went on the back)

With a brown marker circle around the punched hole.

Place tag inside cup and that's about it.


Simple and cute display of love for family!
xx
Sunday, February 10, 2013
Valentine Project - Bookmarks
Hello there,
If you are big on procrastination, I have a perfect valentine tutorial for you. It is super adorable and so easy you can whip a dozen up in just about no time!

Let's start with the Valentine fun!


You will need:
(2) 2" by 7" piece of cardstock
2" by 3" scrap piece of fabric
Scrap piece of cardstock to create heart templates
Needle and thread/ embroidery floss
Punching machine and tape (not shown in the picture)
Craft knife
Scissors
UHU

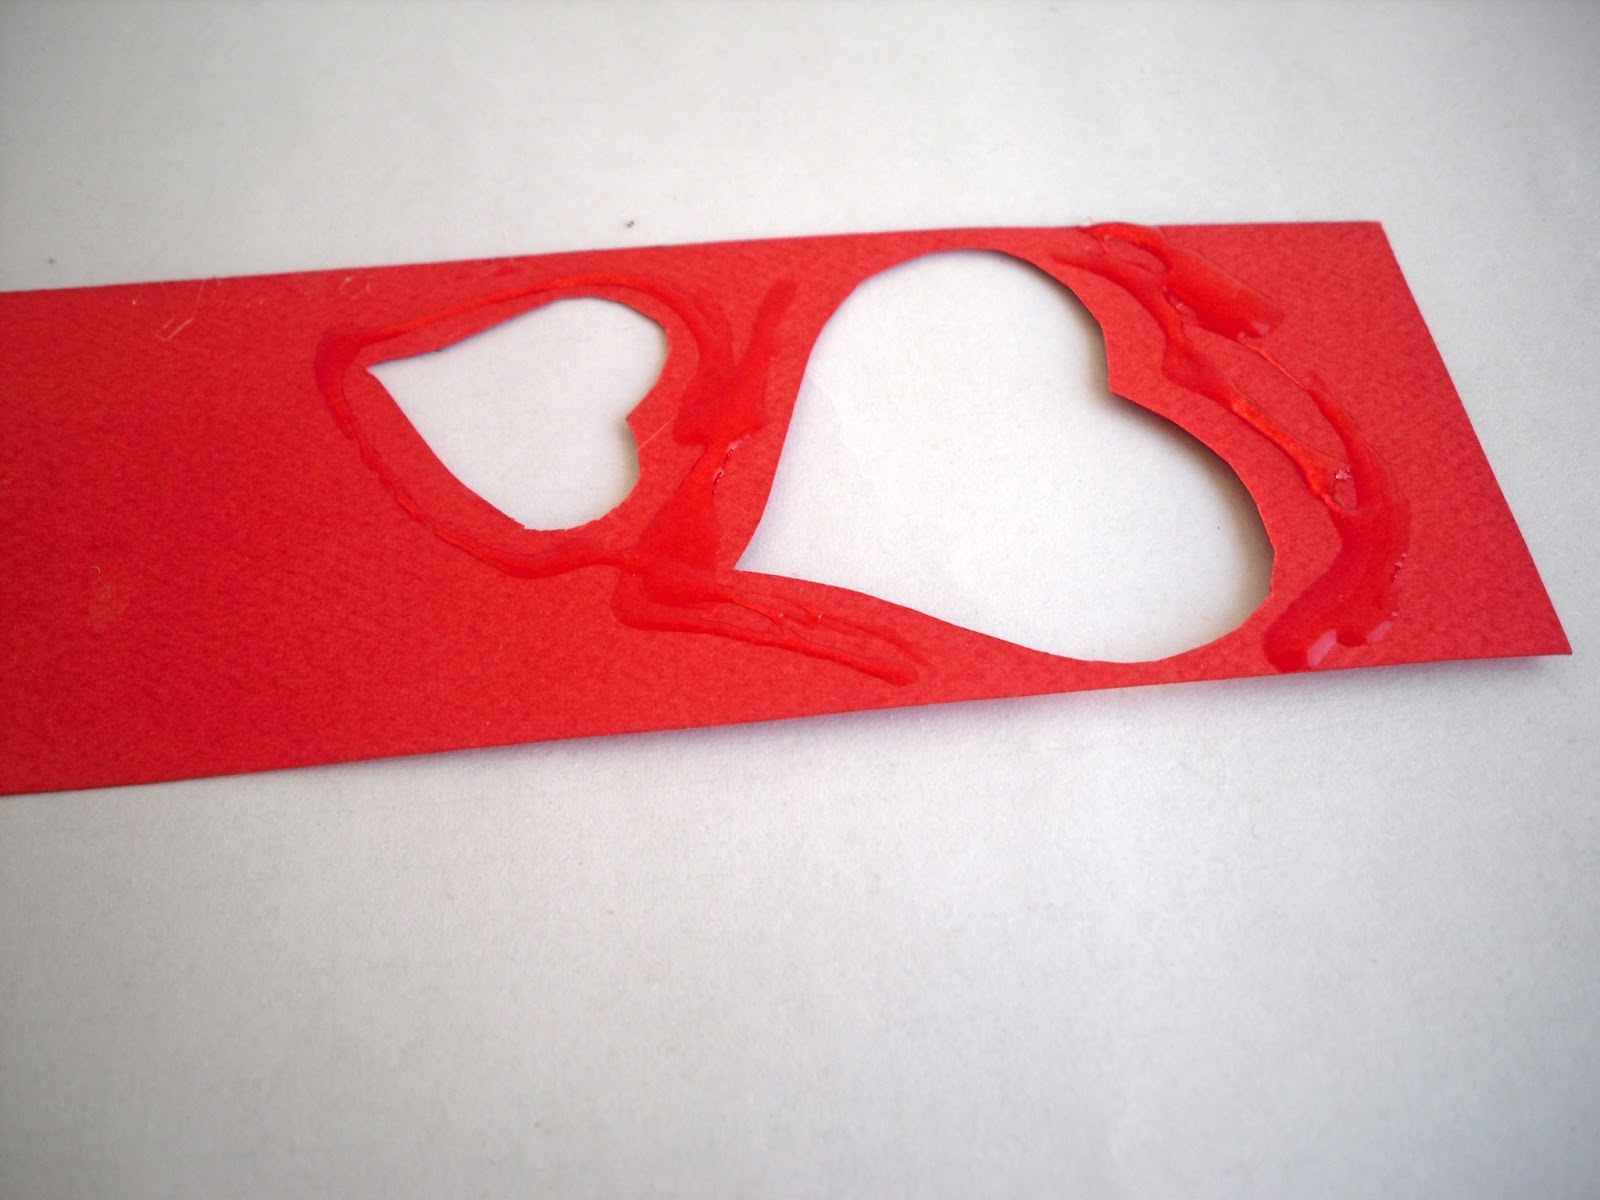
Draw and cut two hearts, 1" x 1" and 1.75 " x 2" from your scrap piece of cardstock/ or any scrap piece of paper.

Place it as desired on 2" x 7" cardstock and trace.

Using your craft knife cut out the two hearts you just traced.

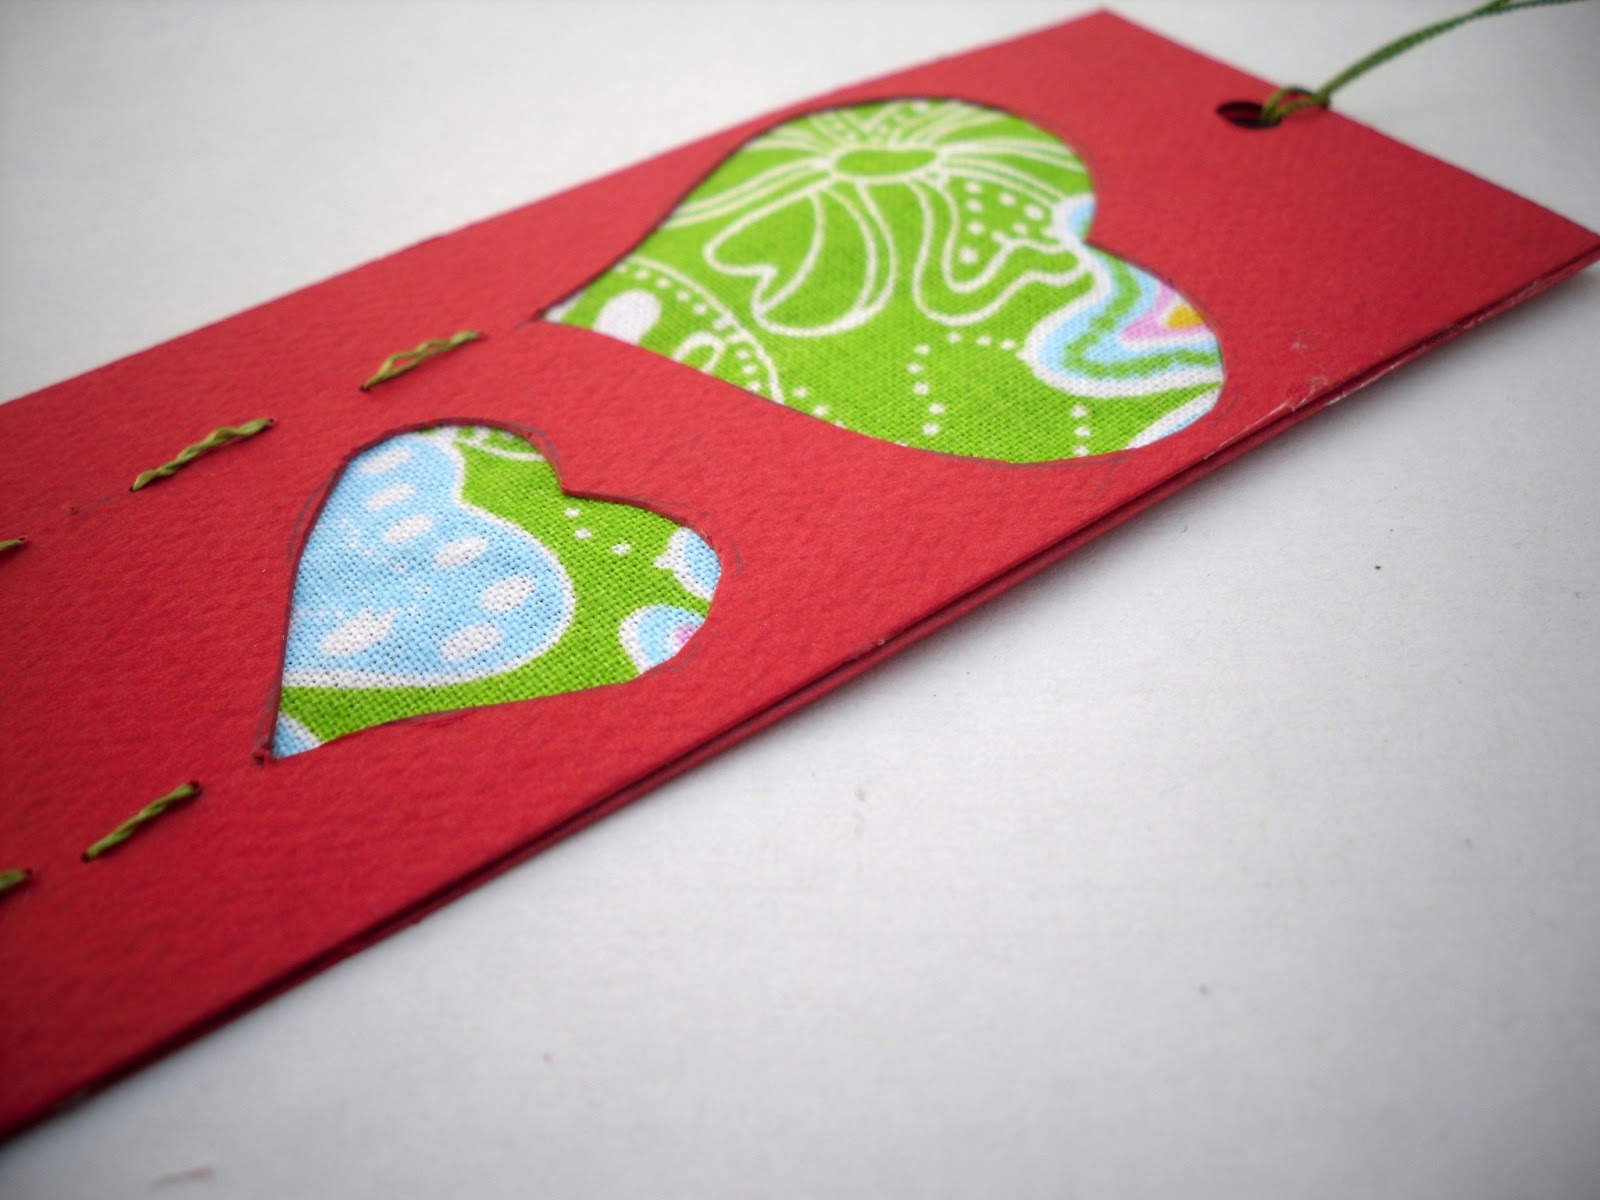
Flip and apply UHU around hearts.
Secure your 2" x 3" piece of fabric.

Next, grab a needle and thread and stitch a stem down both the hearts. Use pencil marks to ensure the running stitch is straight.


Tape off loose ends of the thread.


Take your other 2" x 7" piece of cardstock and secure it to the back of your bookmark. Here you can either use a similar colored cardstock or experiment with different colors and patterns.
Next, punch a hole through the top and secure your thread/ribbon (how to do so is explained later in the tutorial!).
Add your sentiment.


Ta-da! Inexpensive and handmade Valentine gift that everyone will LOVE!
And now for some variation.

To get this look, thread embroidery floss onto your needle and stitch around the smaller heart.

This one is fun! You can keep one half and give the other to your friend/someone you love.
I simply placed two bookmarks side by side, traced and cut out the heart. Next, I ironed interfacing onto the back of 2" x 3" piece of fabric for structure and adhered the heart onto the bookmarks.

Then went snap snap with scissors.

Using green thread, stitched heart around the smaller heart.

Repeated with the other bookmark.

Did likewise with the larger heart (half hearts?)

Punched hole and tied yellow embroidery floss!

Simply adorable!

Right, right, gotta tell you how to tie thread/ribbon/embroidery floss through a punched hole!

Okay, so cut a piece of embroidery floss (length is up to you).

Fold it in half and knot the two loose ends together.

Slip the folded end through the punched hole.

Then push the knotted end up through the looped end.

And pull!

Easy right?


If you are big on procrastination, I have a perfect valentine tutorial for you. It is super adorable and so easy you can whip a dozen up in just about no time!
Let's start with the Valentine fun!
You will need:
(2) 2" by 7" piece of cardstock
2" by 3" scrap piece of fabric
Scrap piece of cardstock to create heart templates
Needle and thread/ embroidery floss
Punching machine and tape (not shown in the picture)
Craft knife
Scissors
UHU
Draw and cut two hearts, 1" x 1" and 1.75 " x 2" from your scrap piece of cardstock/ or any scrap piece of paper.
Place it as desired on 2" x 7" cardstock and trace.
Using your craft knife cut out the two hearts you just traced.
Flip and apply UHU around hearts.
Secure your 2" x 3" piece of fabric.
Next, grab a needle and thread and stitch a stem down both the hearts. Use pencil marks to ensure the running stitch is straight.
Tape off loose ends of the thread.
Take your other 2" x 7" piece of cardstock and secure it to the back of your bookmark. Here you can either use a similar colored cardstock or experiment with different colors and patterns.
Next, punch a hole through the top and secure your thread/ribbon (how to do so is explained later in the tutorial!).
Add your sentiment.
Ta-da! Inexpensive and handmade Valentine gift that everyone will LOVE!
And now for some variation.
To get this look, thread embroidery floss onto your needle and stitch around the smaller heart.
This one is fun! You can keep one half and give the other to your friend/someone you love.
I simply placed two bookmarks side by side, traced and cut out the heart. Next, I ironed interfacing onto the back of 2" x 3" piece of fabric for structure and adhered the heart onto the bookmarks.
Then went snap snap with scissors.
Using green thread, stitched heart around the smaller heart.
Repeated with the other bookmark.
Did likewise with the larger heart (half hearts?)
Punched hole and tied yellow embroidery floss!
Simply adorable!
Right, right, gotta tell you how to tie thread/ribbon/embroidery floss through a punched hole!
Okay, so cut a piece of embroidery floss (length is up to you).
Fold it in half and knot the two loose ends together.
Slip the folded end through the punched hole.
Then push the knotted end up through the looped end.
And pull!
Easy right?
Go have some fun creating your own.
Happy crafting! xo
p.s: Don't throw away the heart cut outs just yet! We'll put them to good use in the next tutorial :)
Subscribe to:
Posts (Atom)