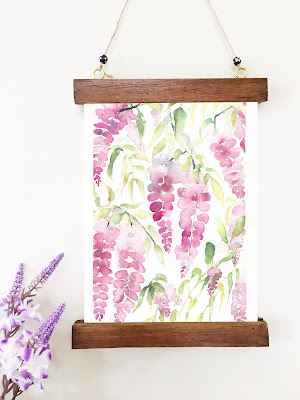
Ever since I got back to painting, I have been looking for exciting and inexpensive ways to hang my art. I first saw these wood frames on Pinterest and instantly fell in love. I just had to make one for myself but without breaking the bank!
I am so stoked at how these turned out and I love how easy it is to change my artwork whenever I want without the hassle that comes with boxed frames. So if you are like me and love switching artwork then read on to learn how to make these for yourself. The best part, you can create this in whatever size you want!
Materials:
Artwork
Four pieces of Balsa wood
Magnetic strip
Cutter
String
2 Eye Screws
Allow the stain to dry then cut and glue magnetic strip on one side of the wood. Repeat with the remaining three strips.
Then take one of the wood strip and measure half inch in from either ends and mark. Twist eye screws into the points you just marked until fully in.
Thread your string through the eye screws and tie a knot. Optional- you can add beads or any other ornament before you tie the knot.
Now lay the piece with the eye screws down so that the side with the magnetic strip is facing up. Lay your artwork on top, straight and centered. Then place another strip on top so that the two magnets are facing each other. Do the same for the bottom of your artwork. And that's it: your beautiful wall art is all set to hang.
 |
| Wisteria |
I hope you enjoyed the tutorial. If you love the Wisteria painting above, you might enjoy looking at more in my previous post.
Have a lovely week! xx
P.S: If you followed this tutorial to create your very own picture hanger, then please do share. I would love to see it! :)


No comments:
Post a Comment