Showing posts with label painting. Show all posts

Tuesday, January 17, 2017

Leafy Watercolor Valentine Heart Tutorial

With Valentine's Day quickly approaching, it is never too early to start preparing for it.


If you are looking for a diy and something that involves paints (and color other than red:p) then I have just the tutorial for you.  You can either frame the final painting or turn it into a card for your loved ones. 

To create your very own leafy valentine heart art, gather the following supplies:

Watercolor paper 
Brushes
Green watercolor paint (or your preferred color)
Tracing paper 

Begin by printing out your leafy heart template. 


Transfer the leaves onto your watercolor paper using a tracing paper.


Next, grab some green paint and start painting. I painted the leaves using both wet on wet and wet on dry wash technique. You can learn more about the techniques here and here. Or check out the little video of me painting these leaves here. 


Let your painting  dry. And that's it. Wasn't it easy? You can play with colors, go for an ombré look or add text on top with acrylic paint. The possibilities are endless once you let your imagination flow :)


I hope you enjoyed the tutorial. Stay tuned for another easy-peasy one with some florals this time.

Cheers until next time xx

More V-day projects that I have done in the past, that might inspire you. Simply click on the picture to be taken to the relevant project post.


Tuesday, December 13, 2016

Basic Watercolor Washes Tutorial

I hope you enjoyed my tutorial on "Watercolor Techniques".
Today's post will cover some easy watercolor washes that come handy every time you pick up your brush to start a painting.


I have come up with a fun little project for you. All you need to do is gather the following supplies and follow the tutorial!

You will need:
Watercolor paper/ Sketchbook
Watercolor paints
Paint brush
Water

Flat wash
A flat wash is a wash that is completely even in tone. Mix a generous amount of cerulean blue wash in your palette. Load a clean brush and apply a smooth wash across the page. Working quickly, reload your brush again and continue where you left off. Try to avoid any variation in tone and if you are working on a large paper, I'd recommend you use a bigger brush.

Flat wash


Gradated wash
It is a wash that is applied in a similar manner as the flat wash but there is a variation in tone. Load your brush with orange paint and apply a smooth wash across the page. Then add more water as you work your way down so that the color gradually gets lighter. Similarly you can add more of the same pigment to the wash so that it gradually becomes darker in tone.

Gradated wash

Variegated wash
This is a variation of the gradated wash but instead of adding more water you gradually introduce another color. This is great for when you are painting sunsets.

Variegated wash

Wet on wet wash
This is can be done in two ways. Load brush with clean water and wet the entire area. While the paper is still wet, apply paint. Dropping gorgeous colors on to damp paper is an exhilarating experience as you can never predict exactly what will happen or how far the paint will spread on paper. 
Wet on wet

Another way to do a wet on wet wash is to add paint to a wash that has not yet dried. This creates interesting mixes of color. 

Wet on wet

Wet on dry wash
This is pretty easy. Just load your brush with wet paint and apply it to dry paper. The resulting wash will have harder edges as compared to a wet on wet wash.

Wet on dry

Dry on dry wash
With as little water as possible (water should only slightly moisten the brush), load your brush with hookers green. Then holding the brush at an angle drag it across the page. This wash is good for creating texture like when you want to paint grass, rocks or textured walls.

Dry on dry

Dry on dry

Dry on dry

I hope you enjoyed learning these basic watercolor washes. You can also check out my Watercolor Valentine Heart tutorial and see how I have used some of these washes there.


And when you combine some of the basic washes with watercolor texture techniques you can create something like this:

Teapot

Any questions about this post or Watercolor Techniques Tutorial? I'd love to read your feedback! 


Cheers until next time :)

Friday, November 11, 2016

Wisteria Painting

Wisterias
Aren't they stunning?


I wanted a floral painting for my bedroom wall, to go just above my bedside table. I came across lovely wisteria paintings on my Instagram feed and instantly fell in love with this beautiful plant with its stunning purple flowers. I decided to do a wisteria painting and add a little personal touch to my bedroom.

I had a small canvas lying around, perfect size for what I had in mind. I used Pinterest to surf for a reference photo and did the painting in acrylics.

Later, I decided to do another wisteria painting, but this time in watercolors. I tried to paint with a looser and more abstract style, a style that I found more challenging. You can check out my work in progress photos below.


And here is the finished painting. 


What style of painting do you find challenging? Leave me your answers in the comments! 

xx

Monday, November 7, 2016

Watercolor Texture Techniques Tutorial

Ready for a watercolor tutorial?
Let's start with something fun!
Like textures.


Those wonderfully gorgeous textures created just by dripping, sponging, splattering, and more.

So let's have fun exploring some of the ways you can create texture and add interest to your painting. 

But before we begin, gather the following supplies -
Scrap paper cut into 4 inch squares
Paints
Paint brush
Toothbrush
Salt
Cling wrap
Tissue paper

Salt
Lay a very wet wash of ultramarine. While the wash is still wet drop in yellow and orange. Then quickly sprinkle some salt. Brush off the salt when the paint dries.


Splattering
You can make splatters using either your paint brush or a toothbrush. Both will create different effects. Simply load your brush with paint, then holding it close to paper use your fingers to flick the bristles of the brush. Add different colors for a fun effect.


Brush Splatter
Toothbrush Splatter

Dripping
Load your brush with lots of water and paint. Hold the brush directly above your paper and let the paint drip down on to the paper. You can tilt or blow on it with straw for some cool effects.


Sponge
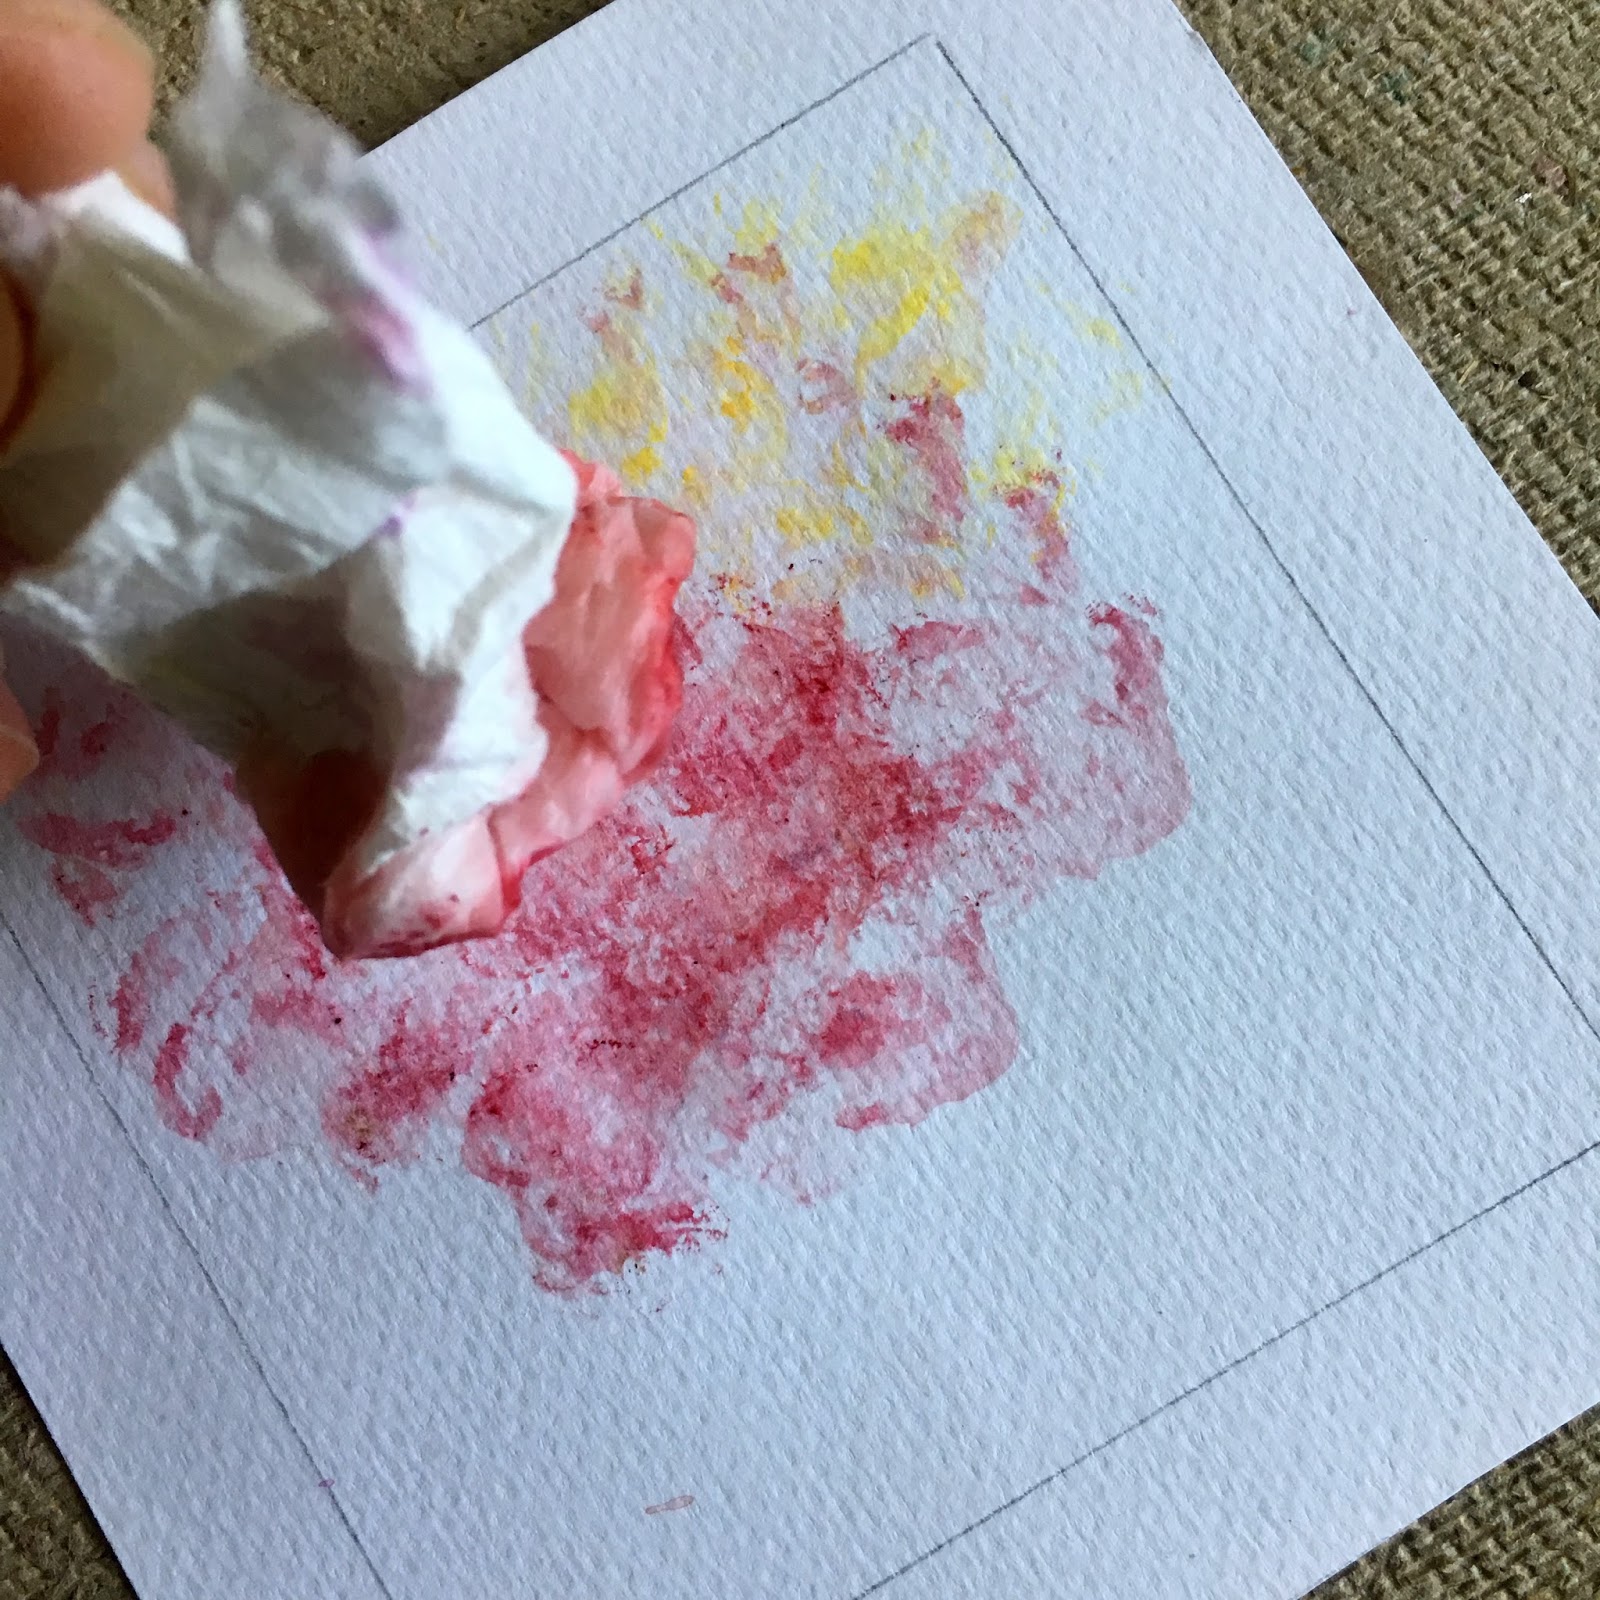
I used kitchen paper for this. Dip your kitchen paper in some wet paint. Then dab it on to paper. You can play by adding different colors.


Cling wrap
Brush on a wash of paint and while it is still wet place a crinkled piece of cling wrap on top and press it down with your fingers. Allow it to dry before you remove the cling wrap.


You can combine more than one technique to add that extra oomph to your work. Have fun exploring these techniques!

xx


Friday, November 4, 2016

Exploring And Trying Out New Art Materials

When your little one is down for her nap,
You take out your new art materials and experiment.


Or read that book you borrowed from the library but never managed to get past the first page!

Recently I tried working with smooth watercolor paper. It's perfect for pen and ink and paintings that don't require much layering.


You can check out how I painted these carrots here and leaves here.

And I also tried to do calligraphy.


I love to try new art materials. What new materials have you tried recently? 

Monday, October 17, 2016

Hello!

I have been busy this weekend giving the blog a fresh little makeover. I have added some cute buttons on the right so that you can easily follow me on Facebook, Instagram and Pinterest and added a direct link to my Etsy shop in case you feel like purchasing original watercolor paintings for your home or as a gift for your loved ones this Christmas. 

I took a break from the blog for a while to look after my little baby. Being a first time mum is crazzzy! Especially when you are living in a foreign country far away from your family. This past one year and a half has been one hell of a roller coaster ride but so worth it all. 

And during this time I rediscovered my love for watercolors. I don't know why I have been shying away from it. If you have never worked with watercolors before then do try them out, trust me you'll love it! 

I also finally managed to set up my online store. When you are a stay-at-home mother to a tiny, super active toddler, and are trying to keep it all together - the mayhem of what we call the parenting or family life - you need an outlet that help define you as a person; a person outside the realm of a mother. Painting for me is that outlet, something that keeps me sane amidst the whirlwind of raising a toddler and keeping the family life running smoothly. And my little online shop is an icing on cake :)

Landscape painting, that got me started on watercolors again

That's all for now. Thanks for reading. Have a fabulous week you all! <3


Sunday, July 5, 2015

Painting - Bread and Fruit Dish on a Table

I love to recreate paintings by famous artists.
Like this one here.
Taking on such projects is challenging.  You have to work on getting the colors right (if not exactly then as close to the original as much as possible). And since I work with acrylics, getting the colors to match does sometime get difficult. However, when I look at the finished piece, the exhilarating sense of accomplishment and feeling of immense satisfaction seems worth the time and effort.


I replicated Pablo Picasso's "Bread and Fruit Dish on a Table". The artist is famous for co-founding the Cubist movement. And I am a big fan of cubism. Besides impressionism, this is another favourite technique that I like to work with.


I love the vibrant colors. And though I had to struggle a bit with the shades and the painting itself might not be a perfect replica, all in all I am happy with my finished piece! 


Tuesday, March 31, 2015

Painting - Cherry Blossoms

A while back, actually make it a really long while back, I shared a glimpse of a painting I had been working on on my facebook page. I somehow never got around to sharing the finished piece. So let's have a look at it.


Inspired by Starry Night that I replicated for my sister, I decided to do another one in Vincent Van Gogh's style using bold, dramatic and circular brush strokes. Below are a few close up shots of the painting done in acrylics. 


xx