Thursday, February 7, 2013

Valentine's Day printables!

Things are a bit crazy at my end. As I mentioned in my last post, I am in the process of setting up my own blog-shop so trying to get some things done before I launch it here on my blog. Also, my nephew's birthday is coming up and there is much to be done. Eeeek! You can expect a lot of tutorials and printables after to help you pull off a similar party! Who doesn't love DIY birthday party ideas?!! 

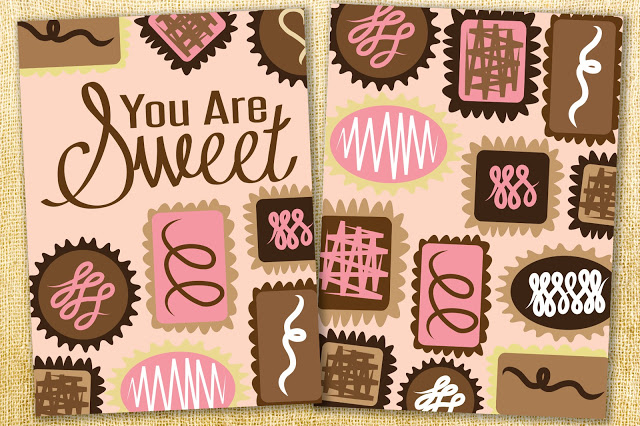
But for now I thought I'd share some free Valentine's Day printables that I came across while surfing the net. Some are great for your kids and I bet they'd love giving these to their friends. 

Below is the list with credits and links for where to download. Please remember these are for personal use ONLY.

x

1. Multi-use printable at It Is What It Is


2. Valentine's day wrapping paper at Thirty Handmade Days


3. Owl Valentine at  Silver Boxes


4. Woodland creatures at Secret Agent Jospehine


5. Arrow card printable at Sweet Muffin Suite


6. Printable Joke Notes at All for the Boys


7. Owl Valentines at Artsy-Fartsy Mama


8. Kids Valentine Day Card at Ellinee


9. Valentine Day Card at Crafted Love


10. Love Coupons at Beeter Homes and Gardens


 11. Cards and coupons at Love vs Design


Sunday, February 3, 2013

Blog-shop

I am so excited to share this with you!


I have been wanting to do it for months but somehow I never got around to it.


Blame it on laziness?..timing?...or perhaps fear of failure?


But whatever might be the reason, I've finally decided to take the plunge...


 and start SELLING...that's right... we are talking BLOG-SHOP!!


 *HOOTS AND WHISTLES* * DRUMROLL*


So here's how it'll work:

- I'll post about whatever product is available for purchase and quote price at the end of each blog post.
- A separate page titled Shop (similar to Tutorials ) will be there so in case you miss out on any post you can simply go to Shop, browse through the gallery and click on any image to be taken to the relevant blog post with product details.
- If a product interests you, Contact me and I'll get back to with payment method etc.
- =D


I am still in the process of setting the whole thing up on my blog, I just need to get a few things done before it's up and running. And there might be some changes down the road, but for now we will stick to the above method. 


I hope you are having a wonderful weekend!
xx

Wednesday, January 30, 2013

DIY fabric printing tutorial

I have been PRINTING!


I have been wanting to print fabric for some time. I briefly considered screen printing, but it seems complicated. Besides, I wanted something quick and simple.


Since I have plenty of stencils (and if you are interested, you can easily Make your own stencil), I decided to use those to create my fabric pieces.


SO today I will show you how to create your own fabric using stencil, fabric paints and fabric. With the help of this tutorial you can easily customize fabric for pillows, totes, napkins and so much more!

So let's begin!


You will need:
fabric paint
fabric medium
fabric
stencil
stencil brush/foam
masking tape 
draft paper/newspaper/to cover your work space

Begin by preparing your work area. Lay your fabric flat, right side up and tape the corners with your masking tape.


Mix a custom color to your liking. I used pastel green acrylic fabric paint and added fabric medium to it to reduce stiffness.


Next, tape your stencil where desired.


Begin stenciling.


Complete the first section.


Then move the stencil to the right and continue printing chevron pattern.


Repeat with the next row on top until you are done.


You can experiment with different colors to create fabulous chevron prints.


To get this look, stencil leaves in colors of your choice. I used yellow, orange and leaf green.


My printed pieces..don't they look lovely?


And..*drumroll please!*.. I turned the lovely grape green chevron fabric into an envelope clutch!


I am loving my new stash of hand printed fabric!


x

TIPS (things I learned along the way):


- draft paper/newspaper will stick to your fabric so once you are done stenciling a row/first section lift the stenciled fabric up and lay it back down again.
- adding fabric medium made the paint a bit watery so be careful with the quantity.


Monday, January 21, 2013

TUTORIAL: Cookie Monster & Elmo envelope card

Hi,
It's time for another fun project!
And this time we are making envelope cards.


They are fun and super easy.


And won't take much of your time.


So say hello to Elmo


And Cookie Monster.


And gather the supplies to make these cuties!


To make Cookie Monster envelope card, you will need:
Envelope template
A4 black cardstock
A4 orange cardstock
A4 yellowish orange printer paper
Brown cardstock/scrap piece of paper
Black marker
Cookie monster (2) - draw your cookie monsters on blue chart paper, cut and paint.
and a Cookie approximately 3 inch wide  - draw a cookie on cream cardstock, cut and paint. Cut top part of  cookie so that you end up with a few "crumbles".
Glue and foam tape

Print envelope template provided above. Use it as a guide to cut card from black cardstock. Score and fold along the --- lines.


Cut 5 inch square from yellowish orange printer paper and adhere onto inside of card.


Cut 4.5 inch square from orange cardstock and center and adhere onto inside of card


Next, grab your cookie monsters and adhere each on two opposite sides.


Cut cookie for your cookie monster from brown cardstock/scrap piece of paper and add black dots in the center.


Secure it like so:


Add your sentiments and fold the flaps.


Center and secure cookie to seal envelope closed.


Adhere crumbs with foam tape.


Cut 4 inch by 1 inch rectangle from orange cardstock and 3.5 inch by 0.75 inch rectangle from yellowish orange printer paper. Center and adhere smaller rectangle onto larger rectangle.


 Center and adhere onto front of envelope for mailing address/adding recipient's name etc.


And we are done with our Cookie Monster card!


For Elmo envelope card, gather the following supplies:
A4 green cardstock
A4 yellow printer paper
Elmo (2) (again, draw one elmo face and one complete elmo on red cardstock, cut and paint in the eyes and mouth)
Glue

Print envelope template provided above. Use it as a guide to cut card from green cardstock. Score and fold along the --- lines.


Cut 5 inch square from yellow printer paper and adhere onto inside of card.


Adhere Elmo onto right edge of card.


Center and adhere Elmo's face to seal envelope card closed.


Cut a 4 inch by 1 inch piece of rectangle and adhere onto front of envelope for mailing address/adding recipient's name etc.


And that's about it!


These will make wonderful invites and will definitely go with the whole Sesame street inspired birthday party!


Hop over to this tutorial to learn how to make paper pennant banner and for some wonderful Sesame street themed birthday party ideas.